
You can easily import external data into Shape. By importing your contacts to Shape, you are...
Read More »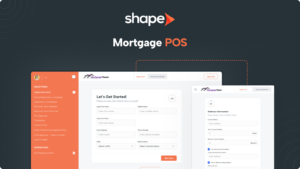


Frequently Asked Questions
How do I add users?
The “Add User” button on the Manage Users Settings page will allow you to add users to your system. A popup will appear prompting you to fill out the user’s basic information, their role in your system, and their phone settings. When completed, Shape will send an invitation to the email provided with the user’s login information.
Here’s a link to the “Manage Users” settings page
How do I import my data from spreadsheets?
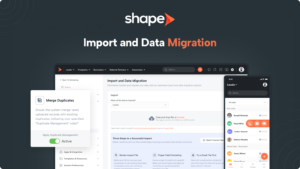
You can upload a CSV file with a maximum of 3,000 records per file on the Imports settings page. Mortgage CRM templates support MISMO 3.4 and FNM 3.2 files. MISMO & FNM files do not require mapping and the records will be assigned to the user that imports the file, but must be statused after importing as these files do not include statuses.
When you import contacts to Shape, you’ll match each column in your import file to a field in your Shape Software system. Certain types of fields, like email address and birthday, require a specific format to import correctly, which are outlined in the Import Support Guide. Fields from your file are defaulted to append to the notes sidebar and this option is used for fields in your CSV file that do not have a corresponding field in Shape.
Here’s a link to the “Import” page in Shape
How do I make a call in Shape?
Outbound dialing in Shape includes 2 options: the Webphone (dialing from within your internet browser) and Call Forwarding (calls are routed to an external phone such as a cell phone or desk phone). Your calling preference can be set from within the Shape Dialer Slideout or from within your user profile.
The webphone popup is what facilitates making and receiving calls in Shape and this popup is automatically launched upon logging into Shape and if it is closed out then no calls can be made or received until it is launched again so you will want to minimize this popup while logged in.
To dial you can click the phone icon from your list view and within a record as well as manually typing in the number in your dialer slideout.
Where do I find my portal link to share with customers?
Your portal referral link can be found within your user profile in the Portal Referral Link field. From there you can copy and paste this into manual communications as well as embed it in your website and email signature for customers to quickly apply.
Can I change the columns on list views?
You can easily bring more columns into your list view by clicking on the “Columns” drop down and using the check marks to select the columns you would like to see then clicking on “Apply Changes to List.” You can also reorganize your columns by clicking on “Organize Columns” and using the click and drag feature to move the columns as needed.
When I turn on a drip campaign, will it send to all contacts in that status?
Once you turn on a drip campaign, it becomes active from the time you turn it on into the future. This means that contacts that have been sitting in the initiation status for a long period of time before the campaign was turned on will not be enrolled in the campaign and do not send retroactively.
Any records in the initiation status at the time the campaign was OFF will need to be changed into a different status and then back to the initiation status in order to be enrolled into the campaign once turned ON.
Drip campaign communications are set to send when the record hits the initiation status, and stop when an end status is reached or when the campaign runs out of content.
How do I customize the system?
Your system comes out of the box with best practices for your industry however this does not work perfectly for everyone and there are a number of configurations that can be made to suit your system to your business needs. Anything that you can customize and configure within Shape Software is available to users with the appropriate permission via the “Settings” pages.
If you’re looking for more extensive customization, please submit a customization request to support@setshape.com with details of your requests for more information.
Can I add custom fields?
Yes! You can add custom questions to the Shape POS Customer Portal as well as custom fields by utilizing the “Custom” Workflow Tab! The “Custom” tab can be enabled from the Manage Departments Settings Page and to customize portal intake questions, this can be done on the “Manage Customer Portal” settings page.
Who can I talk to about charges to my account?
You can reach out to our dedicated Billing Team by email at billing@setshape.com to answer any questions regarding charges to your system. A breakdown of charges made to your account can also be found in your Billing and Transactions Settings page within your system.
How can I reset my password?
You can reset your password anytime from the log in screen by clicking “Forgot Password?” Alternatively, you can reach out to your system administrator to reset your password on your behalf as well as reaching out to our dedicated support team at support@setshape.com.
I deleted a record unintentionally, how can I get it back?
You can have an Administrator in your system restore any deleted records from the Deleted Records Report for up to 90 days. Alternatively, you can email support@setshape.com to restore any records deleted from your system.

